



Burst Camera

Deskripsi Burst Camera
★★★★★ "Die beste" - Markus Fross
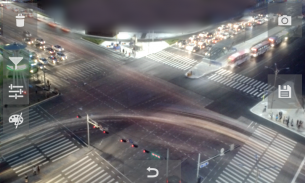
GonnyCam is a burst mode camera app that lets you take photos at up to 1920 x 1080 (2 Megapixel) resolution in burst mode! UPDATE: GonnyCam now supports the Camera2 API on selected devices (e.g. Nexus5,5X,6, Android 5.1.1+), allowing continuous burst shooting in up to 8 Megapixels!
Doubtful? Install GonnyCam and give it a try, it's free!
Please note that not all phones support 2 megapixel or higher continuous shooting. However you can still shoot in 1 megapixel resolution!
Turn on "Use Android Camera2" in the settings to access Camera2 features.
Features:
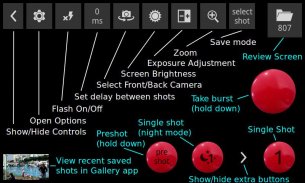
- High frame rate: up to 30 frames per second on high end devices! Most phones that meet that minimum specs required can achieve rates of at least 10-12 frames per second at 2 megapixels, and even faster at lower resolutions
- Long bursts, limited only by SD card space
- Ad-free
- Zoom
- Exposure adjustment
- Optional continuous flash in burst mode
- Screen brightness adjustment
- Standard camera configuration options available from the options menu: Scene Mode, White Balance, Focus Mode, Single Shot Flash mode, ISO, Color Effects
- Saves photos automatically in portrait or landscape
- Front/back camera
- Single shot mode, optionally using your camera's maximum resolution (supported on most phones)
- Adjustable delay between shots
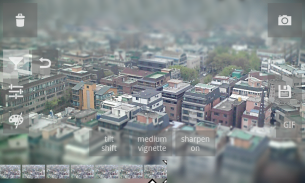
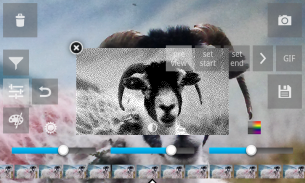
- Save animated GIFs. Lots of options: GIF resolution, # of colors, color/monochrome/black and white, dithering etc, with preview
- Effects: Tilt shift blur, vignette, lomo style vignette blur, soft focus effect, sharpening filter
- Chroma denoising filter to reduce color noise
- "Select shot" mode (shoot a burst then select which photos to save) and "save all" mode (saves all photos automatically)
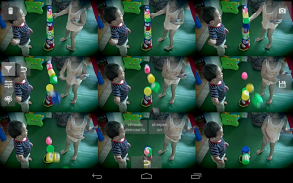
- Blend function: blend multiple images together for a simulated long exposure effect, or arrange in a grid montage
- Low light/night mode
How to use GonnyCam in select shot mode:
1. Press and hold down the big red button to take bursts of photos. Take as many bursts as you want before reviewing them.
2. When you are ready, press the folder icon in the corner of the screen to review your photos.
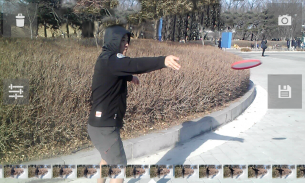
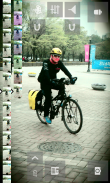
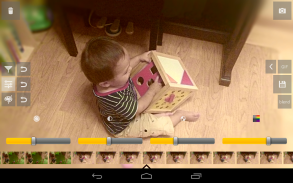
3. Scroll left and right through the reel of photos to select the best shots, then tap the save icon on the right of the screen. Save as many as you want! Photos are saved to your Pictures folder, in the GonnyCam subfolder.
4. Optionally delete the remaining photos to save space on your SD card by tapping the trashcan icon.
5. Press the back button or tap the camera icon to return to the camera and take more photos!
How to take single shots with GonnyCam:
1. Press the "1" button in the bottom-right corner of the screen. This takes a photo and saves it to Pictures/GonnyCam. It also saves the photo to your burst reel, in case you want to edit and re-save it later
2. Optionally press the single-shot thumbnail on the left of the screen to open your preferred photo viewer app and view the photo
Notes:
GonnyCam uses libjpeg for saving photos in the JPEG image format
Shoot in a well lit environment for best results and fast frame rate
Tap the screen to focus, or just let the auto-focus do its work
If you have any problems getting GonnyCam to work on your device, feel free to email me
Please rate and review if you like it!
</div> <div jsname="WJz9Hc" style="display:none">★★★★★ "Die beste" - Markus Fross
GonnyCam adalah aplikasi kamera mode burst yang memungkinkan Anda mengambil foto sampai dengan 1920 x 1080 (2 Megapixel) resolusi di mode burst! UPDATE: GonnyCam sekarang mendukung Camera2 API pada perangkat yang dipilih (misalnya Nexus5,5X, 6, Android 5.1.1+), yang memungkinkan meledak terus menerus menembak di hingga 8 Megapixels!
Diragukan? Menginstal GonnyCam dan mencobanya, gratis!
Harap dicatat bahwa tidak semua ponsel mendukung 2 megapiksel atau lebih tinggi continuous shooting. Namun Anda masih bisa menembak dalam resolusi 1 megapiksel!
Aktifkan "Gunakan Android Camera2" dalam pengaturan untuk mengakses fitur Camera2.
Fitur:
- Frame rate tinggi: sampai dengan 30 frame per detik pada perangkat high end! Sebagian besar ponsel yang memenuhi spesifikasi yang minimum yang diperlukan dapat mencapai tingkat minimal 10-12 frame per detik pada 2 megapixel, dan bahkan lebih cepat pada resolusi yang lebih rendah
- Semburan panjang, hanya dibatasi oleh ruang kartu SD
- Gratis Ad-
- Zoom
- Penyesuaian Exposure
- Opsional flash terus menerus di mode burst
- Penyesuaian kecerahan layar
- Pilihan kamera konfigurasi standar tersedia dari pilihan menu: Scene Mode, White Balance, Focus Mode, modus flash Ditembak Single, ISO, Color Effect
- Menyimpan foto secara otomatis dalam potret atau lanskap
- Depan / belakang kamera
- Modus ditembak Single, opsional menggunakan resolusi maksimal kamera Anda (didukung pada kebanyakan ponsel)
- Delay Adjustable antara tembakan
- Simpan animasi GIF. Banyak pilihan: resolusi GIF, # warna, warna / monokrom / hitam dan putih, dithering dll, dengan preview
- Efek: Tilt pergeseran blur, sketsa, lomo gaya sketsa blur, efek fokus lembut, mengasah penyaring
- Chroma denoising penyaring untuk mengurangi kebisingan warna
- "Pilih tembakan" mode (menembak burst kemudian memilih foto yang akan menyimpan) dan "menyimpan semua" Modus (menyimpan semua foto secara otomatis)
- Fungsi Blend: berbaur beberapa gambar bersama-sama untuk efek simulasi paparan panjang, atau mengatur dalam montase jaringan
- Cahaya rendah modus / malam
Cara menggunakan GonnyCam di pilih modus ditembak:
1. Tekan dan tahan tombol merah besar untuk mengambil semburan foto. Mengambil banyak semburan yang Anda inginkan sebelum meninjau mereka.
2. Bila Anda siap, tekan ikon folder di sudut layar untuk meninjau foto Anda.
3. Gulir kiri dan kanan melalui reel foto untuk memilih gambar terbaik, lalu ketuk menyimpan ikon di sebelah kanan layar. Simpan sebanyak yang Anda inginkan! Foto akan disimpan ke folder Gambar Anda, di subfolder GonnyCam.
4. Opsional menghapus foto yang tersisa untuk menghemat ruang pada kartu SD Anda dengan menekan ikon tempat sampah.
5. Tekan tombol kembali atau tekan ikon kamera untuk kembali ke kamera dan mengambil lebih banyak foto!
Bagaimana untuk mengambil gambar tunggal dengan GonnyCam:
1. Tekan "1" tombol di sudut kanan bawah layar. Ini mengambil foto dan menyimpannya ke Gambar / GonnyCam. Hal ini juga menyimpan foto ke gulungan Anda meledak, jika anda ingin mengedit dan menyimpan kembali nanti
2. Opsional tekan thumbnail tunggal-shot di kiri atas layar untuk membuka aplikasi penampil foto Anda dan melihat foto
Catatan:
GonnyCam menggunakan libjpeg untuk menyimpan foto dalam format gambar JPEG
Menembak di lingkungan baik menyalakan untuk hasil terbaik dan frame rate yang cepat
Sentuh layar untuk fokus, atau hanya membiarkan auto-focus melakukan tugasnya
Jika Anda memiliki masalah mendapatkan GonnyCam untuk bekerja pada perangkat Anda, jangan ragu untuk email saya
Silakan menilai dan meninjau jika Anda suka!</div> <div class="show-more-end">


